
by Zach Warner
I unscrewed two screws on the air flow meter, now my car won't start. (possible fix)
So you too appear to be a vicitim of "common sense". Don't feel bad, I was a bit embarassed too.
While diagnosing causes of emissions failure on my Brother's 1991 Miata, it was recommended to me by a member on the forums to clean the "hotwire" on the MAF sensor (or mass airflow sensor). Unknowingly, early year NA Miatas don't have a MAF sensor, but instead an AFM (air flow meter), which doesn't have a hotwire to clean at all. Furthermore, if you don't tamper with it, a AFM rarely needs replacement.
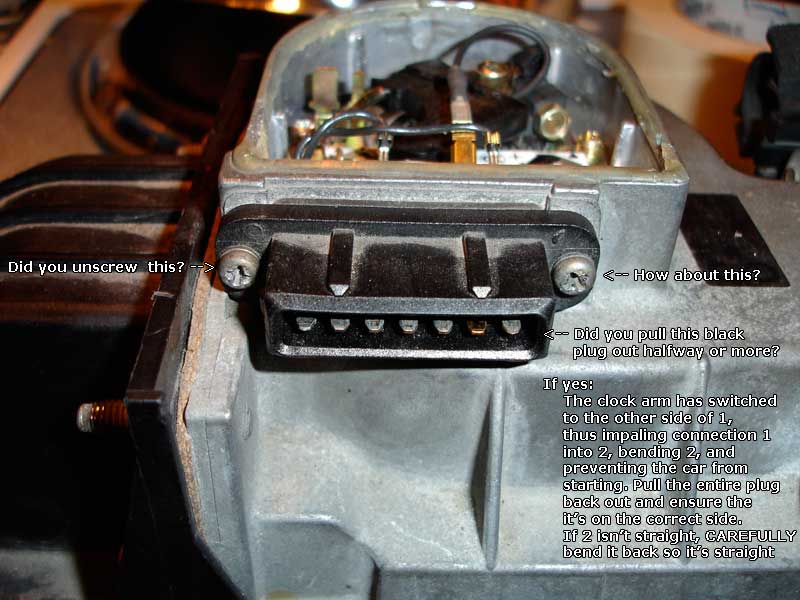
Nevertheless, I went ahead and did what I thought was the logical approach. I removed the wire harness, and removed the two screws. When I went to pull out "the sensors", I realized this might not be the way inside, judging from the tiny hole and a set of thin pins protruding. I was a little disconcerted, and only pulling it half way out, I decided to put it back in and replace the screws.
I put the AFM back in the car, the car wouldn't start! Uh oh... Well at the time it was less obvious to me why it wasn't starting because I had just performed multiple services, including a decoke on the engine.
After stressing and doing lots of research, I finally decided to google "fix afm miata" in google. The first result was very helpful, it made me feel like less of an idiot for my mistake because someone else had done the same thing and offered a solution. While that guide is useful, it didn't fit it completely, let me explain.
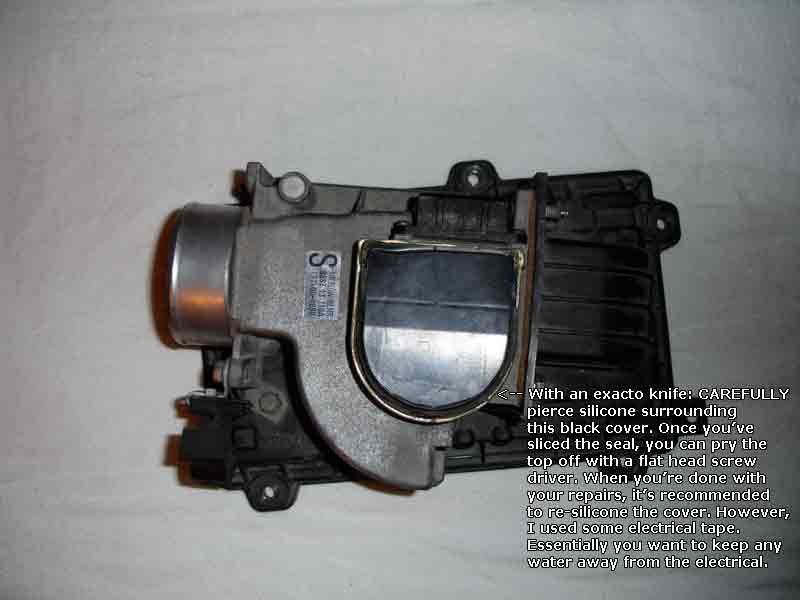
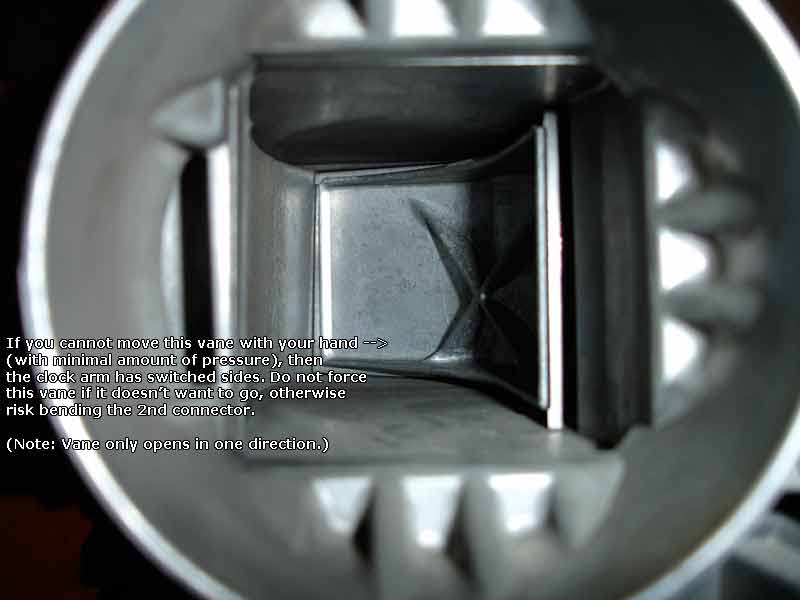
I popped the siliconed cap to expose the circuit and clock spring assembly. At first it wasn't apparent that when I pulled out the black connector part that I had switched which side of connection 1 that the lever hit. This effectively drove connection one into connection 2 enough to bend it. It also prevented the vane from opening.
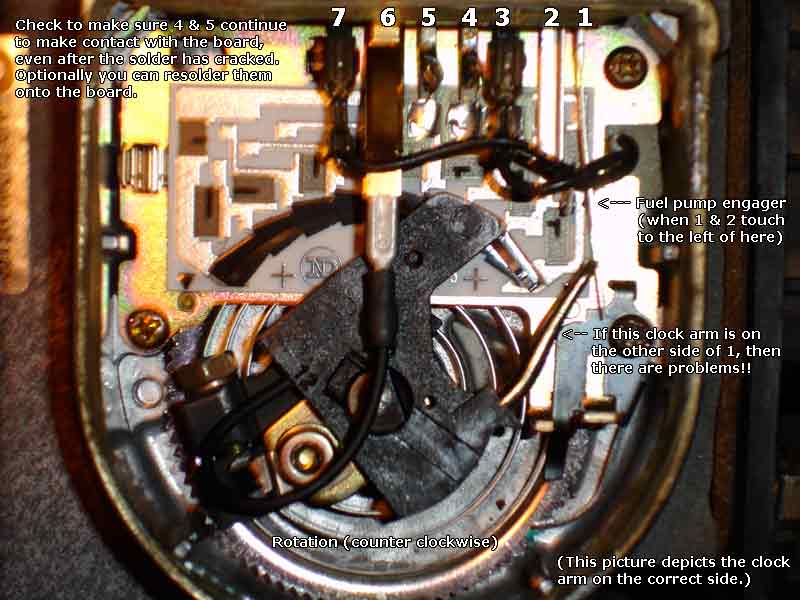
I decided to start where I had left off, the part where I removed the screws. First I removed the 3 slide on connectors for the pins. I had also broke the connection 3, 4 and 5's solder joints. So I carefully removed the entire thing. I bent back connection 2 so it was straight, it once again paired with connection 1 like it should. This also took care of the the lever arm hitting connection 2 and preventing the vane from opening. I then reinserted carefully back in, this time ensuring that the lever arm was to the right of connection one, thus unpairing connection 1 and 2, but only at resting state, when moving the arm to the right it connection 1 and 2 repaired with each other.
Now for the cracked solder for the pins, they still touched for me, for some they may need to be resoldered. I plugged back in connection 3, 6, and 7.
While I was in here, I adjusted the air/fuel ratio by rotating the clock spring, but that's an entirely different tutorial altogether. It should only be messed with for good reason, so for now don't mess with it!
Put the AFM back in the car, started perfectly again, no problems! For the air intake tube, I inserted the bottom of an empty cola can so nothing got in there.
I hope this helped someone!
Special thanks to:
Harry's Miata Garage Page
For knowing I wasn't alone and offering some help and explanation, and of course pictures!
Walter Motor Sport
For pictures of AFM, help with adjusting clock spring, and let's not forget a picture that comparatively showed me that connection 1 was bending the wrong direction for me!
| Back to Garage |
2 January, 2009 |
| [Home] - [FAQ] - [Search] - [Sponsors] - [Forums] |
| [Garage] - [Clubs] - [Contact Us] - [Disclosures] - [More...] |
Copyright
©1994-2024, Eunos Communications LLC
|