
by Joel Webb
My 1999 Miata suffered from the all too common 'Center Console Plastic Hinge' failure. This problem went unresolved until I was in the local WoodCraft store and found their 11/16" Non Mortise Hinge part # 27G12. You get 2 hinges per package with 8 screws for $1.99. This hinge looked like it would work as a replacement for the broken plastic.
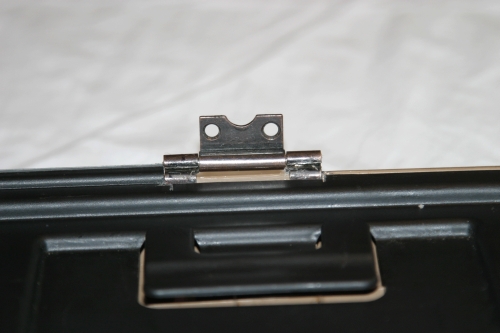
1. The first step in the hinge modification is to reverse the center portion of the hinge by driving out the hinge pin and flipping over the center part of the hinge and re-inserting the Pin. The next step of the hinge modification is to place the larger outside portion of the hinge in a vice and put a 90 degree bend in the hinge approximately 1/8" below the hinge pin barrel. It is important to make this bend in the correct direction so that the hinge ends up looking like the one in the photo below. I used a small hammer to gently strike the hinge barrel while in the vice to get the 90 degree bend.
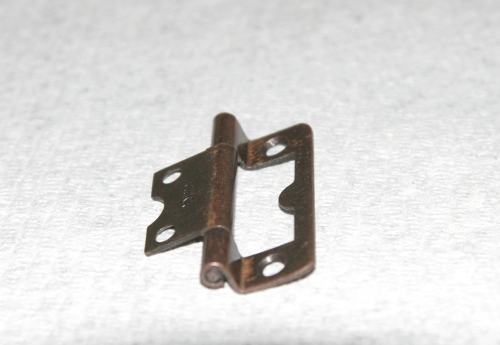
Note the direction of the bend in relation to the hinge pin barrel.
2. Next is the plastic surgery on the hinge lid and center console. Remove the center console lid by removing all the hinge screws including the one on the broken plastic hinge. There are two screws holding the pivot arm (for lack of a better term) attaching it to the console top and you can remove these and leave the pivot are and center console bottom in place. The next step is to remove the bottom section from the center console top. This is held in place by a number of slots in the bottom section of the top and a couple of pins in the front of the console top. Start from the back of the console and gently pry the two sections apart with a table knife of small screw driver working from side to side, back to front.

Once the top is removed you must determine where to position the replacement hinge in relation to the Center console top and bottom. I replaced the console top minus the bottom of the top just removed back on the center console and then selected a position that did not cover any of the tabs used to secure the bottom of the console top and still allowed a good forward position of the new hinge. You can get an idea of the position from the photos but its better to measure and mark twice on your own Miata before beginning the plastic surgery.
On the center console underside there are ribs interfered with the hinge fitting all the way in so using a utility knife with a sharp blade or an Xacto knife cut a couple of small slots into the ribs to the hinge will fit all the way into the top (see photo below).
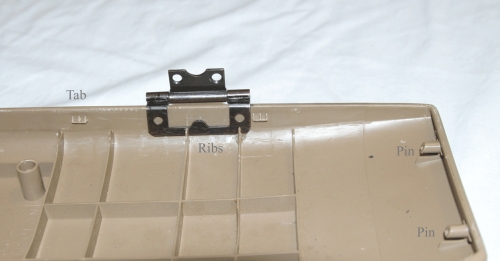
On the underside of the top cut out a corresponding slot that will allow the two pieces to clip back together with the without interfering with the hinge (Photos below).
Once the two top parts have been modified make the location of the hinge so you can glue the hinge to the top of the console. I used a hot melt glue gun for this but there are probably better alternatives to securing the hinge. Just make sure that the hinge is in place and the two console top pieces fit without interfering with the hinge operation. I put the two pieces back together and marked the opening just to make sure that I glued the hinge in the correct position.
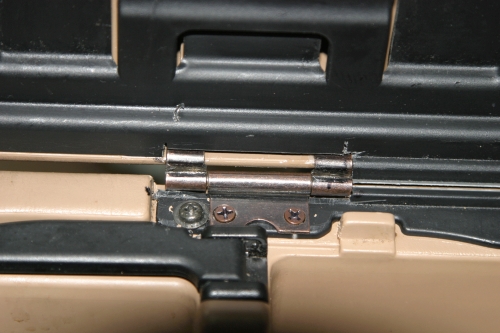
Once the glue has set snap the two pieces back together starting with the two tabs at the front fitting these over the two pins at the front of the top. The photo below shows the hinge secured to the top and the two pieces of the center console top back together.
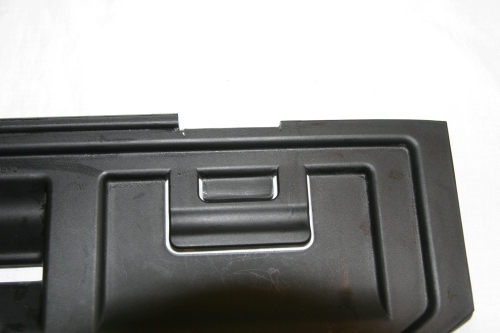
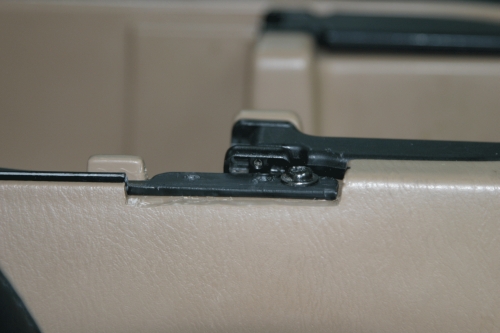
The next step is to mark the cutout for the hinge on the bottom of the center console. I replaced the console top and marked the location of the hinge on the bottom of the center console. I again used the utility knife to remove enough plastic to allow the fitting of the hinge (See photo below)

Detail of the center console cutout to allow placement of the hinge.
The final piece of plastic surgery is the removal of a section of the plastic hinge material that will allow this piece to act as a spacer for the new hinge. I replace the old section of the hinge back on the center console and marked a section that matched the cutout in the photo above. Again using the utility knife I removed a section of the old hinge to match the hinge cutout (photo below).
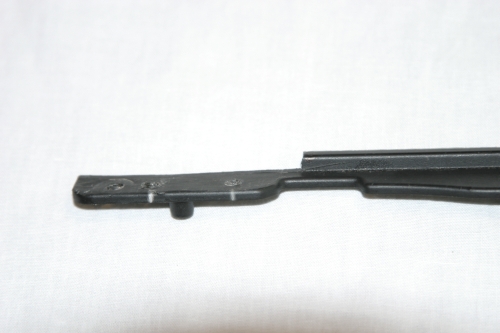
When cutting the plastic it is better to repeatedly score the plastic with the utility knife slowly cutting into the plastic that to try to cut it with just one or two cuts. I have to be really careful when using sharp objects. I'm lucky to still have all my fingers abet with a few scars!
Here is a photo of the lower console cutout with the plastic hinge section screwed in place.
3. The final steps are to replace the console top screwing in the two back hinge screws and the two screws for the pivot arm. Next position the front hinge to the proper position and drill two small pilot holes through the old hinge (spacer) and the bottom center console. Using two of the screws that came with the hinge screw the new hinge in place taking care not to strip the plastic in the console. You want the hinge secure but take care not to over tighten the screws.
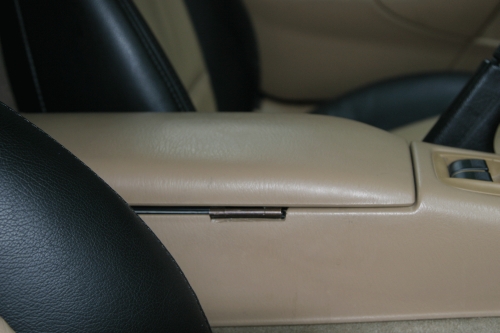
The final product is a fully functioning center console that looks good. As a final note, I probably could have searched around and found a black hinge in the same configuration but the antique copper finish on the WoodCraft hinge looks pretty good and no one but me notices that it's not black.
| Back to the Garage |
11 October, 2009 |
| [Home] - [FAQ] - [Search] - [Sponsors] - [Forums] |
| [Garage] - [Clubs] - [Contact Us] - [Disclosures] - [More...] |
Copyright
©1994-2024, Eunos Communications LLC
|