 Introduction
Introduction
People make changing a convertable top sound like heart surgery. "It's gonna leak", "you are going to screw it up", "you need all these special tools", "you should take it to an expert", "not even dealerships do that kind of work, they hire professionals." Yeah, yeah. I've heard that before. Well I'm here to tell you that it isn't that difficult at all. Anyone who has managed to adjust their timing, remove their tie down hooks, or install aftermarket parts on their car should be able to install a brand new convertable top in an afternoon with a few common tools.
Before you start dissasembling your car, remember that I'm just a shade tree mechanic. I play with tools for fun when I'm not working with computer networks. This article is based on the two (yes, just 2) Miata convertable tops I have changed. From talking to people, these instructions should work for any Mazda MX-5 Miata from 1990-1997 with the factory convertable top, but both of the cars I worked on were 1990 US Models.
Materials and Tools
The first time I changed my top it was kind of unplanned, and for various reasons I chose to order a top from J.C. Whitney. It cost about $200 (US), which was about $150 less than any other Miata top I had seen for sale at the time. I have absolutely no complaints about the top quality or fit. It was definitely worth $200 and I would recomend it to anyone who absolutely needs a replacement top but is on a tight budget like I was when I owned two Miatas. I didn't care for the material too much, it had a high gloss to it and looked to be closer to a dark grey rather than black. The other big issue was that of the rain rail.
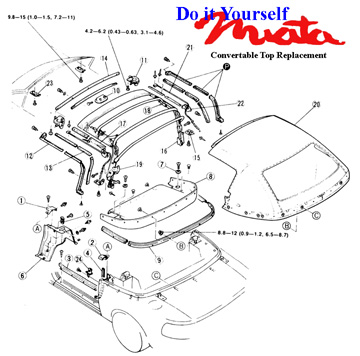
The rain rail is a piece of plastic that is riveted to the back edge of top cloth from one side to the other. Most tops require you to remove the old top, drill out the rivets and attach the rain rail to your new top. There are 13 bolts that go through the rain rail and the top in addition to a dozen rivets that hold the thing together, every one with it's own hole. The J.C. Whitney top had most of the holes marked, but not punched so most of a whole day involved punching holes in the fabric, lining them up with holes in the rain rail, and figuring out which holes were used to rivet the rain rail assembly to the top cloth and which holes were used to attach the top to the car.
The second time I bought a top from Johnson Robbins company, who by this time had a very good reputation on the Miata mailing list as a quality vendor. This time I had plenty of time to save my pennies and decide which brand I should go with. I came very close to buying one of the tops that Robbins offers with a glass rear window, but in the end I decided to go with the OEM style with a plastic window. The big difference this time was that Robbins offered their tops with the rain rail already attached. (You can get them without, but consider yourself warned) I paid almost $400 directly to Robbins this time, and the only real dissapointment I had was two weeks later when I saw the exact same top for sale from an aftermarket vendor for over $100 less. The top matched the OEM top exactly, and the stitching, seams and zipper seemed to be sturdier than the originals. The rain rail was already attached from the factory, and all of the mounting holes were pre-punched. If circumstances would require that I replace my top again, I'll probably buy another Robbins, although this time I'll shop around first. There are a lot of other companies manufacturing Miata tops now, and there are several styles and varieties to choose from so I can't say that any single brand is better than any other.
The tools needed are suprisingly few. A phillips and regular screwdriver, a pair of pliers, a ratchet set with at least a 10mm socket and a short (4"+) extension, a rivet gun with a selection of rivets and an drill to remove the old rivets. An electric screwdriver or wrench would have been real nice instead of the ratchet since the top is held in by fine threaded nuts over a 1" stud and there isn't much room to manuver.
The Process
The first step is to remove the carpet from the rear parcel shelf. Put the top up for this. If your zipper is broken or your window won't stay up then secure it out of the way before you start. The carpet is held in place by a bunch of those little plastic clips and two phillips screws on the rear deck. I destroyed about 5 or six of the clips getting them out, but you can get replacements at most auto parts stores like Pep Boys or Auto Zone. You can even get them from your friendly Mazda dealer if you want to keep the car 100% original.
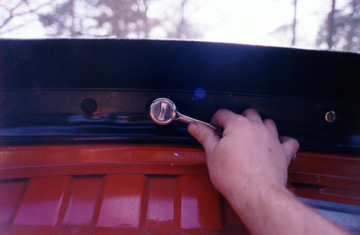
Once the carpet is out you will have exposed the 10 mm nuts that hold the back of the top to the car. There are also two more of those plastic clips that hold the rain rail to the car at each end, but you will probably have to lower the top to get to them. I removed all of the nuts, and took out the three metal bars that they secure. If you are reusing the rain rail, be gentle. It is very fragile and you can easily tear then ends off. Next you need to unlatch the top and open it halfway.
The top fabric is attached to the front of the top frame by a bunch of phillips screws that go though a metal strip that Mazda calls the 'setplate' in the Shop Manual. You don't have to remove the latches or the handle.
There are two screws on either side of the setplate that attaches the first (of 3) window mouldings. Once these two screws are removed then you can just pull the rubber moulding from the chrome weather strip mounts. The middle moulding just pulls out and the 'bottom' piece is secured at the bottom by a pair of those press on things. After the rubber is removed then the weather-strip mounts are easily removed with a phillips screwdriver. I like to lay these pieces out exactly as I removed them from the car. You can probably figure out which one goes where if you HAD to, but its easier to just keep them together.
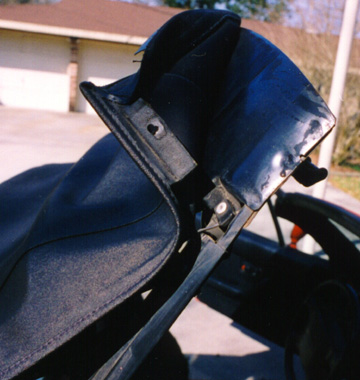
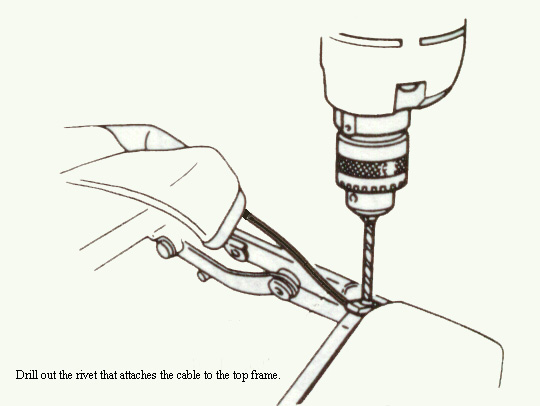
Now all thats left holding the top on is a few rivets. One rivet on each side holds a cable to the top frame. The cable runs through the top fabric. I think I used a 1/4" drill bit to get the rivets out, but I'm sure anything kind of close will work. Other than the rivet that holds the cable in, there are 2 or 3 on each side that hold the top fabric to the frame.
You can also see how the end of the OEM top has a 'pocket' that slides over the metal top frame which neither the Robbins or the JC Whitney tops had. (and I wish they did)
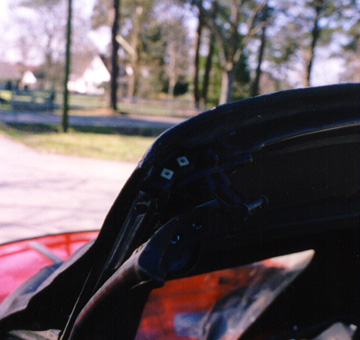
Peeling away the old top. I've already drilled out the rivet holding the cable to this end of the frame. The other end of the cable is attached to the frame with a screw, but it also is attached to a spring which is almost impossible to pass through the top fabric. It would make more sense if you could unscrew the cable instead of drilling out this rivet, but I found it easier to just leave the screw alone and replace the rivet. Be careful when drilling out the rivet, the tab of metal isn't the strongest part of the top and you don't want to break it off.
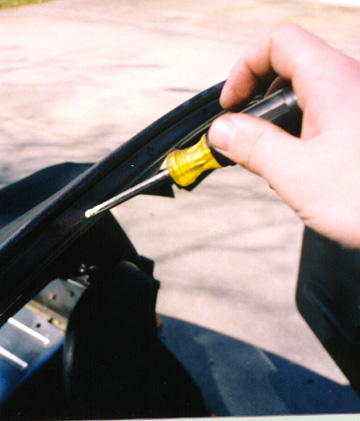
Notice that my old top had separated from the top bow, so I could just peel it back. Use a plain flat blade screwdriver to pry the gap in the top bows wide enough to remove the old cloth. It has to be wide enough to insert the cloth from the new top, so go ahead and do the whole thing now. The rearmost bow right above the window also uses velcro as an attachment. Once this is free, you should be able to lift the old top fabric off of the car.

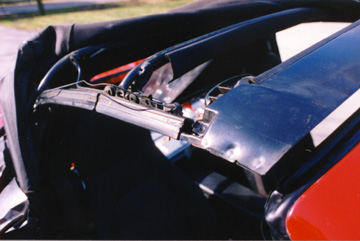
The top frame with the old top removed.

Looks like a roll cage or something... The bottom bar isn't part of the top, it's my BSP cockpit brace that fits between the seat belt towers.
If you didn't get a rain rail with your new top, now is the time to drill out the rivets, and attach the rail to the new top.
Once the old top was off, Installation of the new top was pretty easy. I draped it in place over the frame and started with the cable. The new top had a piece of string on each side to help thread the cable through, and I did need to dig up some rivets that were longer than normal to re-secure the cable end to the top frame. After the cables were in place, I reattached the set plate, then the weather stripping. Since the weather stripping adjustment is the most likely source of leaks, I took my time trying to get them back exactly like they were before. It must have worked because my top doesn't leak. Then I crawled back inside and attached the back of the top to the car. The one instruction provided by Robbins involved what order to tighten the hex nuts in the back, which I did follow, but didn't see what problem changing the order around might cause.
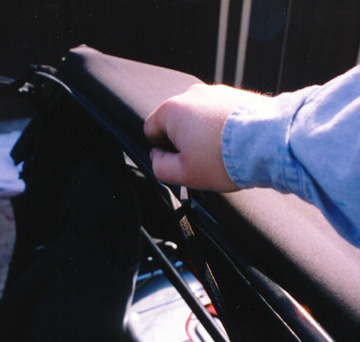
The final step was re-attaching the fabric to the top bows. Once you tuck the end into the slot, pull it tight and crimp it with a pair of pliers. You might want to use an old rag or something to keep the sharp edges of the pliers from cutting the top cloth.
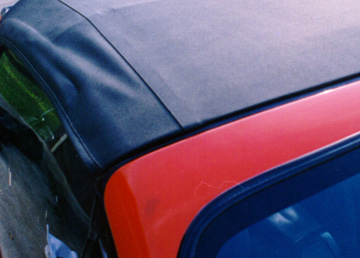
If the Robbins top had copied the pocket of the OEM top, I wouldn't have had to deal with this wrinkle. Wasn't hard, but I shouldn't have had it at all. Considering that this is the only negative thing I could think of saying about the Robbins top, I suppose you could consider it character rather than a flaw. :^) I unscrewed the front weatherstrip, pulled the top tight and re-attached the weatherstrip and it looks fine now.
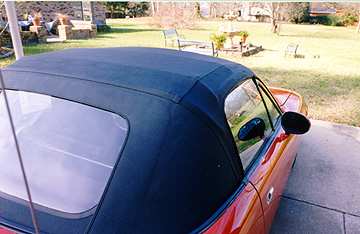

All done!
Contact bkd@usl.edu for more information.