Mazdaspeed Miata Cruise Control Installation
By Doug Collette – dougcollette@comcast.net
This information supplements the excellent instructions that have already been written by others and is specifically focused on installing the Audiovox CCS-100 cruise control in the Mazdaspeed Miata (MSM). Although there are some people that say that a vacuum operated cruise control will not work on the MSM due to the positive pressure (boost instead of vacuum) when the turbo spools up, my experience has been that it works perfectly, even on steep hills. A good, low-cost source for the Audiovox unit is BRANDSPlace.com (http://store.yahoo.com/brandsplace/0002-ccs100.html) where it sells for $80.95.
To start, remove the three screws holding the attached bracket to the servo and reverse the bracket so that it comes off the opposite side of the servo. This will enable you to directly mount the servo to the engine compartment as shown in the following picture. As stated by others, the servo DIP switches should be set as follows: SW1, SW2 and SW4 to ON and SW3, SW5, SW6 and SW7 to OFF.
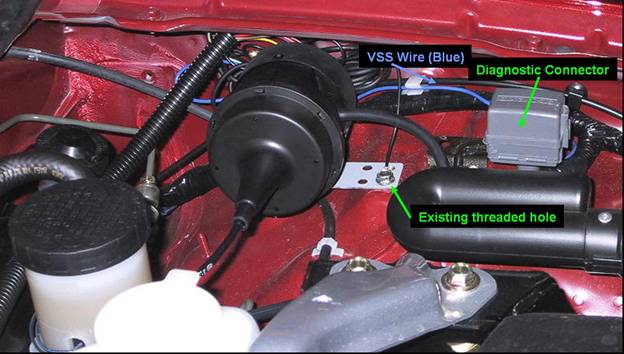
There is an existing threaded hole near the Diagnostic Connector and one of the supplied M6 bolts in the kit fits this hole perfectly. Use this bolt with a lock washer to secure the servo and ground wire.
The blue VSS wire needs to be connected to the green wire with the yellow stripe inside the Diagnostic Connector. Some people have jammed the blue wire into the appropriate connector socket, but if you’re careful, there is room to use one of blue Scotchlock connectors inside the Diagnostic Connector housing. This is much neater, more secure and will let the Diagnostic Connector remain functional.
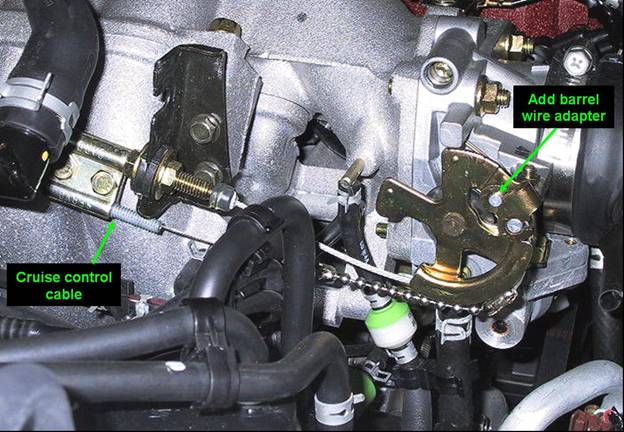
To connect the servo cable to the throttle, I used the throttle cable clamp from the kit and clamped the servo cable below the throttle cable as shown in the following picture. Add the barrel wire adaptor to the throttle mechanism in the hole above the one used by the throttle cable. Cut the bead chain to the correct length and attach using the bead chain couplers. I had to slightly enlarge the opening in the bead chain coupler to accommodate the large hex end of the barrel wire adaptor. It may be necessary to slightly spread the sides of the cable track on the throttle mechanism to ensure that the bead chain doesn’t slip out of the track.
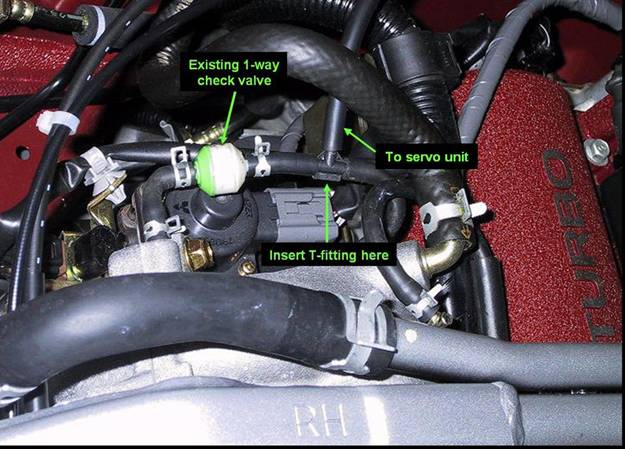
For the servo vacuum source, I used the vacuum line near the rear of the engine. It is advisable to use a one-way check valve in the cruise control servo vacuum line to prevent the servo from seeing positive (boost) pressure when the turbo spools up. Fortunately, there are several one-way check valves already installed in some of the engine vacuum lines. The one-way check valves are white and green barrel shaped plastic pieces. Insert the T-connector from the kit after the one-way check valve as shown in the following picture.
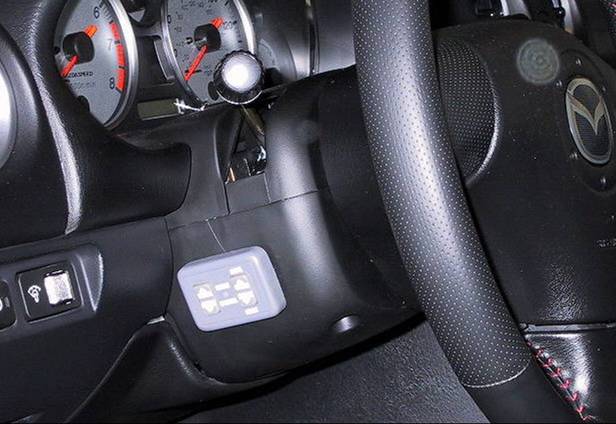
The under dash wiring is the same as described in the NB section and is pretty straight forward. Instead of mounting the control switch assembly on the dash to the right of the dimmer switch, I followed the suggestion of M1MiataMike and mounted it on the plastic housing beneath the steering wheel as shown in the following picture. The housing comes off easily with the removal of three screws and the controls are easy to reach. It’s simply a matter of preference.
Since the switch assembly keypad lighting uses a couple of low-power, long-life LEDs, I decided to solder the grey wire to the red +12V power lead in the 4-pin connector. This leaves the keypad lighting on as long as the car is running but it saved having to find and splice into one of the lighting wires.
Note from Tom Bipes
I mounted mine in the blank panel of the MSM Bose 6-CD changer where an additional cassette/minidisk player would go. This is an option that blends in with the dash better.
| Back to the Garage |
12 June, 2005 |