Parts I Needed:
This page will hopefully help explain how to install temp gauges into a Miata. This project was performed on a 1994 R package. I noticed that one day my temp gauge was constantly showing a normal temp reading, even when I just started the car with a cold motor. This was not good, especially since I was heading to Road Atlanta in a few weeks and it was the middle of June. I NEEDED to know my water temp especially on the track in 90+ degree weather.
I tried replacing my water temp sender on the back of the motor, but that did not fix the problem. I knew I need to fix the gauge that I would need to remove the gauge panel and try to determine what was wrong with the gauge. I decided that this was not the route that I wanted to take because of the inaccuracy of the stock gauge. The stock gauge only show "operating temperature" which is anything between ~180 and ~240. Above that, the gauge goes into the "hot" or far right section of the gauge. The problem here is that anything above 240 degrees is close to boiling and can cause serious damage to the engine. So I decided to go with a real functioning water temp gauge.
I was looking at 2" gauges to fit above my radio and I had to decide between an electrical or a mechanical gauge. Most electrical gauges only have a 90 needle sweep and I wanted a full 270 degrees. There are some gauges out there that have a full sweep and are electrical but their price was around three times as much as the Autometer mechanical water temp gauge I ended up buying. I was thinking about VDO gauges because I have heard good things about them and they are inexpensive, however, their water temp gauge only had a 90 degree sweep and the mechanical Autometer had a full 270 degree sweep. I have heard good and bad things about Autometer, but I am happy with my gauges and have not had any problems.
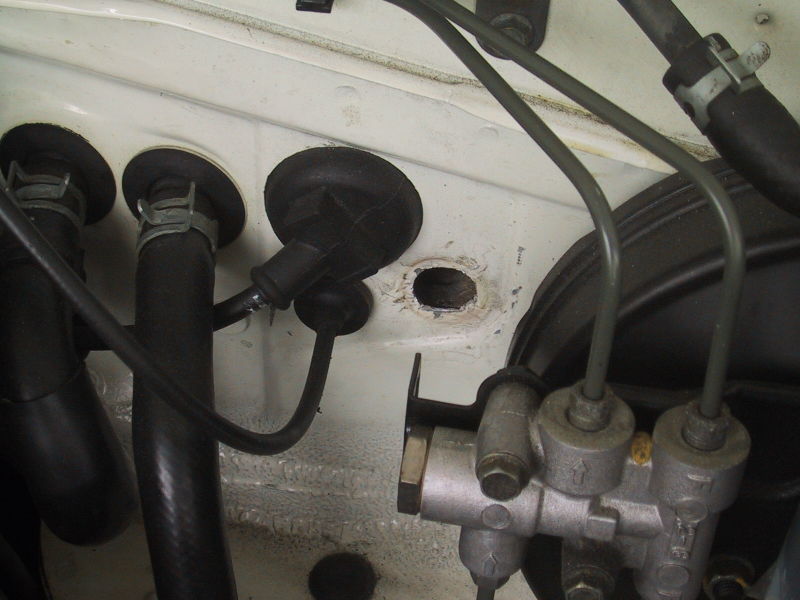
Enough background, now how to install the gauges. First the water gauge because that was the most labor intensive. The gauge comes with a 1/2" temp probe which you must route from the gauge cluster to the engine compartment. To do this you must make a hole in the firewall for the probe and capillary tube. I used the existing hole for the cruise control cable. Since I have an R package and it didn't come with cruise anyway, I would not be needing it. The hole itself is a little square hole just to the right of the throttle cable. You will have to enlarge this hole to about a 7/8" hole to fit the probe through. This is where my Dremel tool came in handy. Above you will see the enlarged hole next to the speedometer cable. Once the hole is enlarged, just slide the temp probe from the gauge cluster, under the dash, through the hole and into the engine compartment.
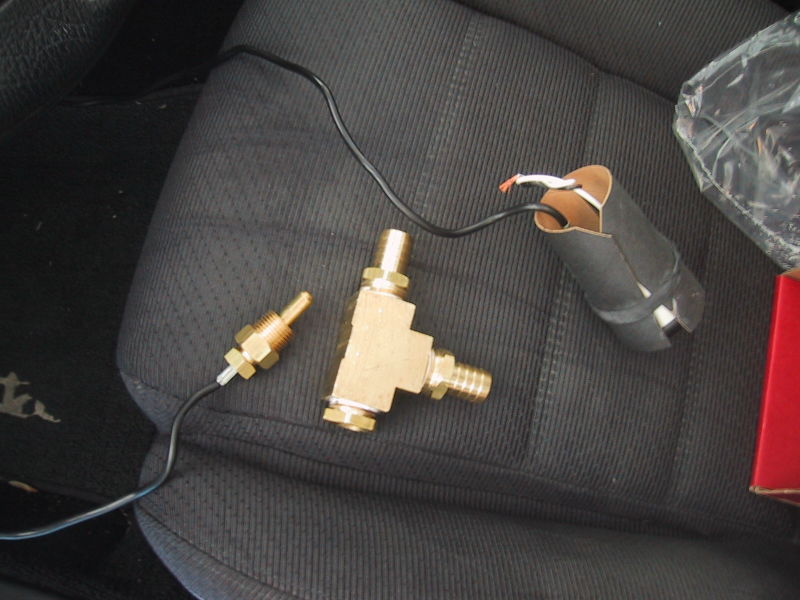
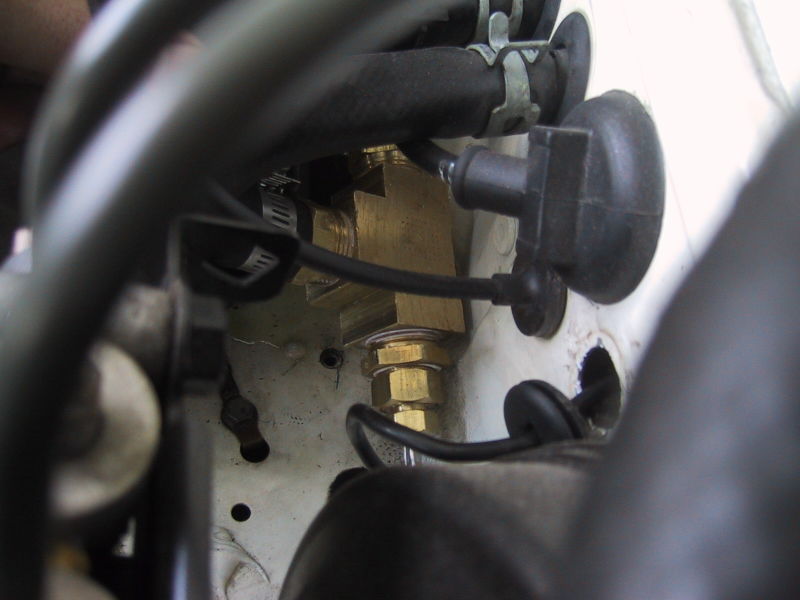
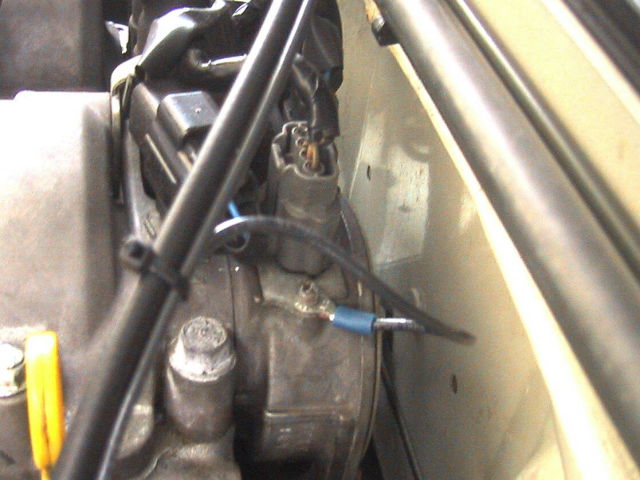
Now I had to find a way to put the gauge's 1/2" temp probe into my coolant system. The way the cooling system works in a Miata is a little inefficient because that the engine was originally designed as a front wheel drive motor. The coolant circulates mostly in the front of the engine block with the rear of the block being the hottest point. This is where I wanted to tap into the coolant system. There is a 3/4" hose going from the back of the block, through the firewall to the heater core. Next to it is the return line which takes to hot coolant into the block. To install the temp probe, I bought a 3/4" Brass Tee, two 3/4" hose barb, and a 3/4" to 1/2" reducer. If you look at the heater hose, it makes a right then goes up before going into the fire wall. If you look at the picture above you will notice that I arranged the tee so that the hose barb ends were 90 degrees from each other and that the reducer was at the opposite end of one of the barbs. I then cut the hose where is made that 90 degree turn, put the two ends on the two hose barbs then used some hose clamps to secure them in place. I then screwed in the 1/2" temp probe from the mechanical gauge into the reducer. Below is the tee and temp probe installed. NOTE: It is a really good idea to drain you coolant system before doing this so coolant does not spill everywhere.

Some people would rather install a electrical gauge and forgo the firewall cutting and just slip a wire through one of the existing factory holes. If you decide to install an electrical gauge, the temp sender will probably be a 1/8" NPT (1/8" - 27 thread count) probe. If you think that you can just remove the factory temp sender and screw this one in, you can forget it. The factory hole is a 1/8" BSP (1/8" -28 thread count) thread. I would not recommend doing this because you would strip the threads in the hole and the only way to fix this is to retap hole in the engine! I just happened to have a spare 1/8" BSP male to a 1/8" NPT female adapter that I used to installing a oil pressure sender on my girlfriends '99 Miata. No good, the temp probe needs to be in the flow of the coolant and the adapter is to small for the probe to protrude into the flow. So back to the heater hose on the back of the engine. You can find a part from some racing part suppliers that you can fit a 1/8" NPT sender into an adapter designed to be put inline with a hose. The ones designed for coolant hoses usually come in 1" and larger. However, I have found a fuel pressure sender adapter for 1/2" fuel line that should work for the 3/4" heater hose, as long as you don't mind it being reduced a little. So cut the heater hose, slip the adapter in the line, clamp it down, then screw it the temp probe. The next step is just to attach the sender wire for the gauge and route it into the cabin to connect to the gauge. NOTE: Since the probe will not be toughing any metal, you will need to ground the body of the temp probe to the engine or frame of the car for the gauge to work.
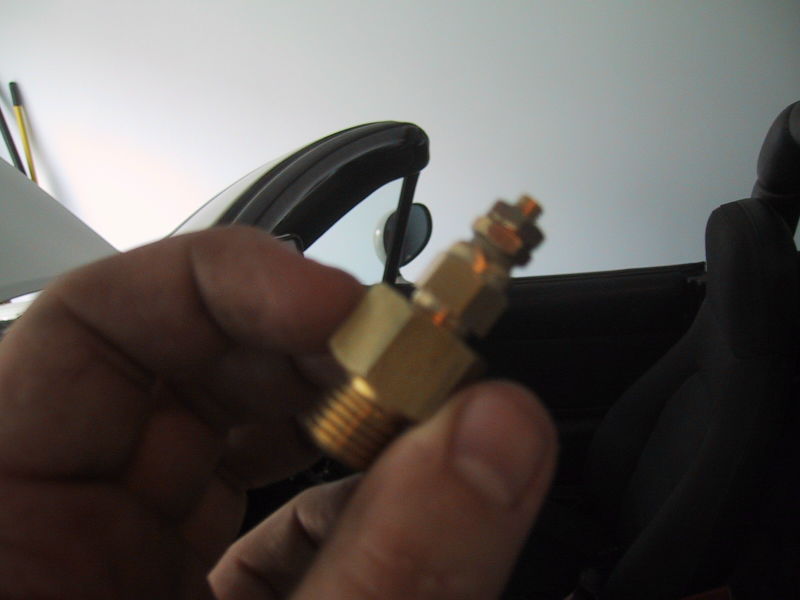
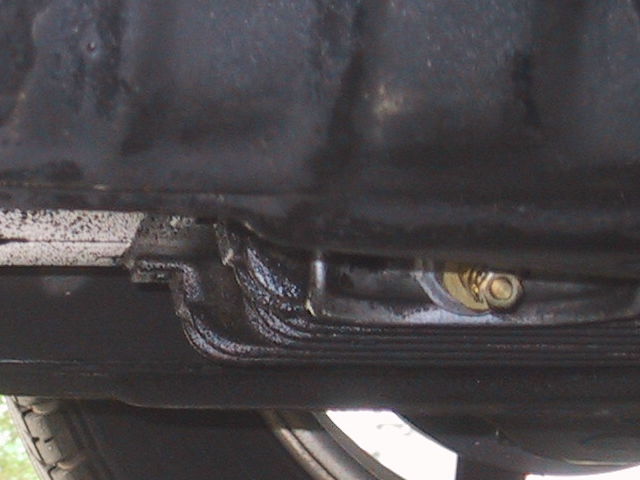
The oil temp gauge was very easy. Instead of trying to tap into the oil system, I just decided to replace my drain plug with the temp sender. First jack up the car and secure it with jack stands!! Next unscrew your drain plug and drain the oil out of the car. Since the oil is drained, you might as well change your filter, don't you think? Autometer had an M14x1.5 to 1/8" NPT adapter that is the same thread patter as the Miata's drain plug. Above is a picture, albeit fuzzy, of the temp sender screwed into the adapter and also a picture of it installed in the oil pan. So simply screw the temp sender into the adapter, then using the supplied crush washer, screw the adapter into the oil pan. That's it, the temp sender is installed.
Now you have to wire everything. Using the 14 gauge wire attach a round wire connector to the end of it and screw it onto the temp sender. Next route the wire from the sender, through the firewall, and then to the gauge. I zip tied mine to the throttle cable and followed it around the engine compartment and through the firewall. Now connect the wire to the back of the gauge where it is labeled signal or sender. Now take some more wire and connect it to the power terminal of the gauge. I connected this wire to the switched power coming from my radio but any switched power source will do. Finally you need to ground the wire. Since the sender is attached to the engine, you need to ground the gauge to the engine. Using more wire, attach one end to the gauge labeled ground and then run the other end through a hole in the firewall and back into the engine compartment. I attached the wire to the back of the valve cover on the drivers side in the rear. Here there are two small screws. Connect the wire to one of these screws and you will have your ground like in the picture above.
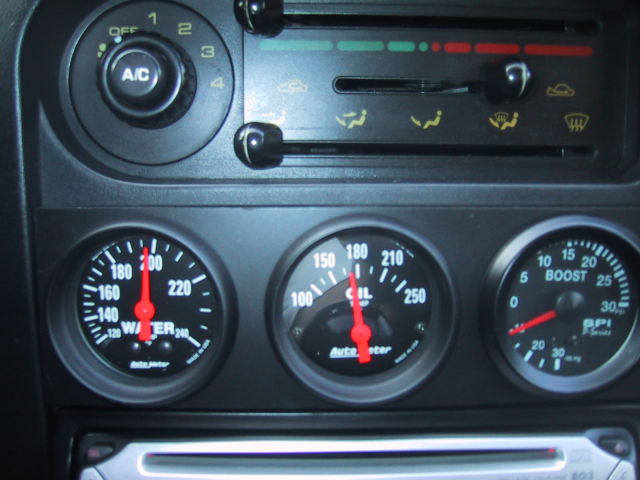
Mounting the gauges is up to you where and how you want to mount them. I just picked up a generic 1 DIN 3 gauge panel and installed above the radio using the mounting hardware supplied with the gauges to hold the panel in place. That is why in the finished picture you see a boost gauge in there. I had a spare gauge that I won and its sole purpose is to hold the panel in. I plan on replacing it with a different gauge, I just haven't decided what yet....or if I get a lot of money, making it a functional gauge!
Well, I hope will help some of you. I do not claim to be a professional and these instructions are what I did to install my gauges. This was written to be an aid and there are no guarantees. What worked for me might not work for you. But I do hope it will aid some of you and keep you from making some mistakes and save you from some of the leg work I had to do. Take care and hope to see you on the road.
| Back to Garage |
19 September, 2004 |